Parth
Yes, you can do it on your own, I am going to add the whole process and link from where you can request a recheck.
Public Recheck User Manual
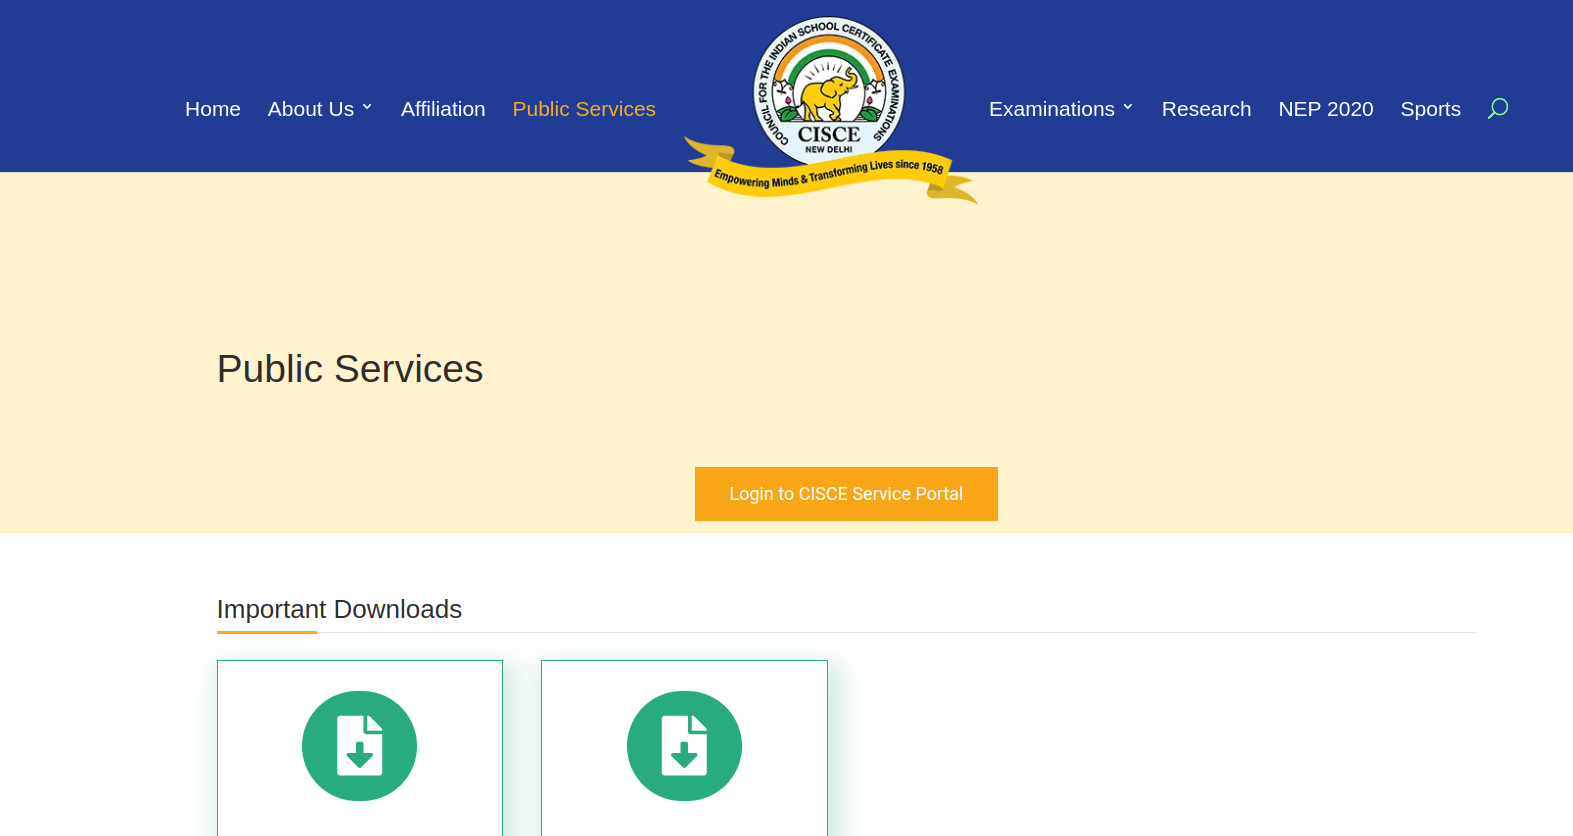
The user can access the recheck link from the Council’s website https://cisce.org/ as shown below and click on the Public Services tab at the top of the page.

The user must click on Login to the CISE Service portal
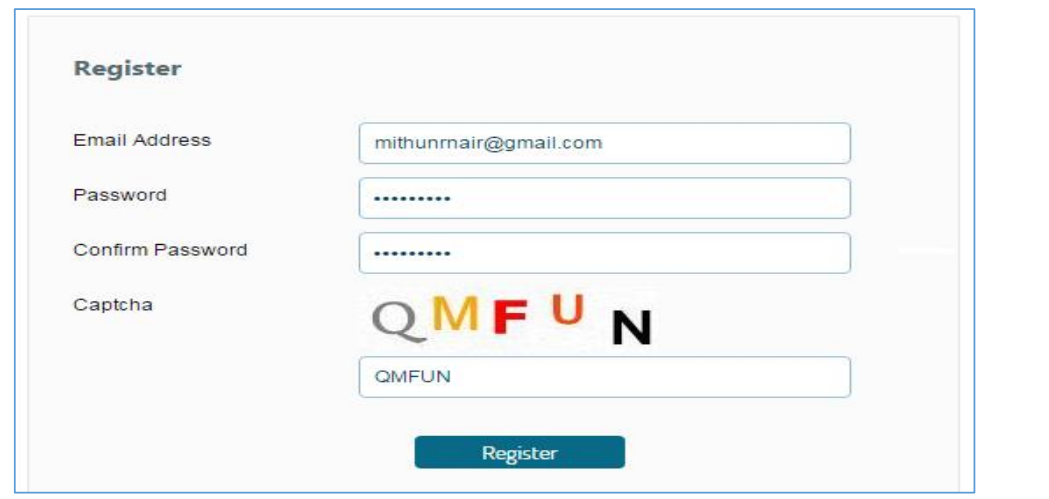
The hyperlink Register now hyperlink take the user to the registration form where the user need to provide the details for registration which are email address, password and a captcha. On successful registration, the user would receive the activation link in registered email address for activating the user account.
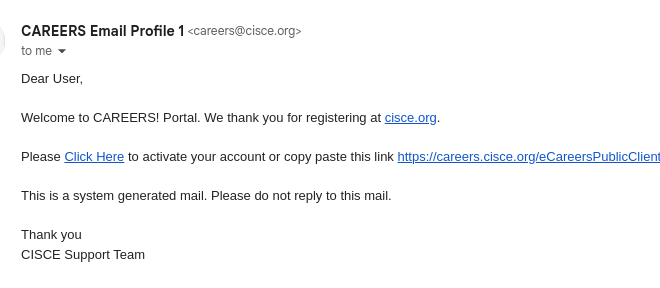
An email like shown below will come to your gmail and you have to click on Click here and add the password to activate the account.

On activation of the account, the user logs in to the council service portal using the link provided in the
CISCE website Login to CISCE Service Portal
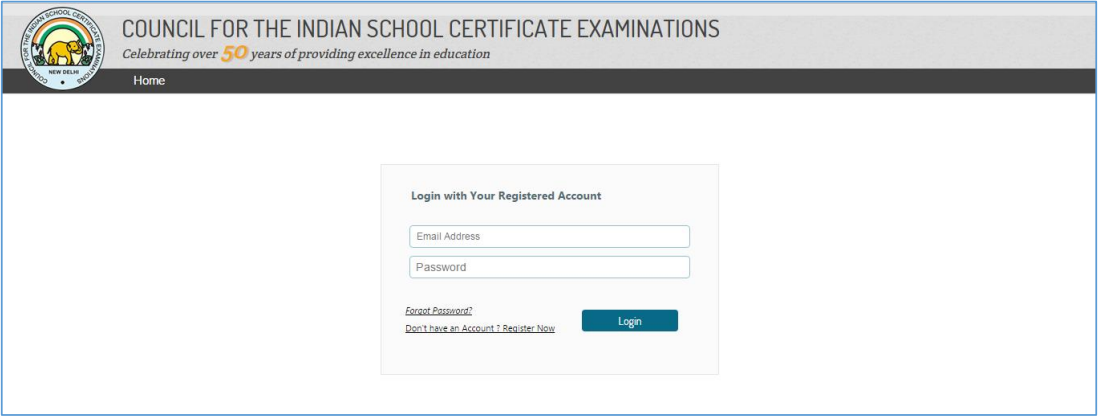
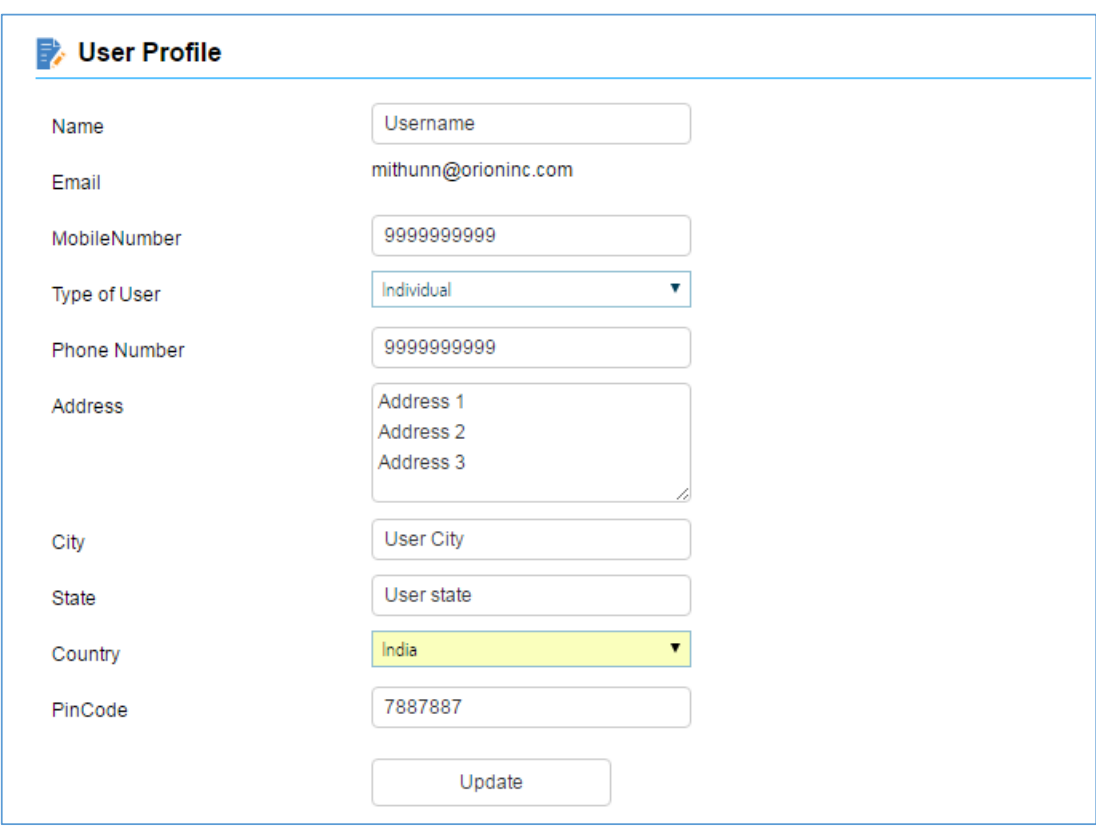
On login, the user gets navigated to the User Profile Update screen, where the user should update the personal details including Name, Email, Mobile No., Type of User (Individual) and address details as shown below. You have verify your mobile number through OTP.
On Completion of Profile Update, the user gets navigated to the Public Service Home screen where the user gets three service options which are Document Duplicate, Verification & Enquiry and RecheckRequest as shown.

The user clicks on the arrow icon on the recheck request icon to get in to the Recheck Module and would land up in the Recheck home page.
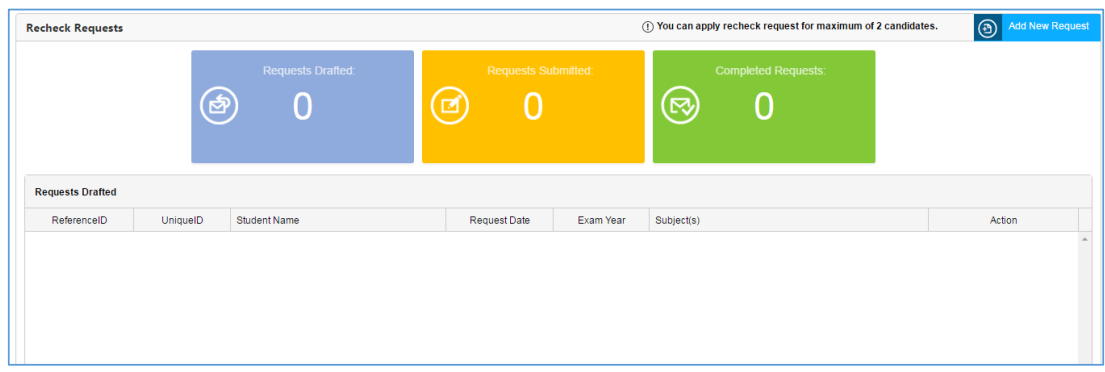
The Home page comprises of three status tiles differentiated by colors which depicts the status of the Recheck requests which are Drafted, Submitted and Completed. The Add New Request button at the top right top corner equips the user to add a new recheck request. The bottom portion displays the list of the recheck requests depends on the selection of the status tiles.
The Council allows the user to add recheck for maximum two candidates.
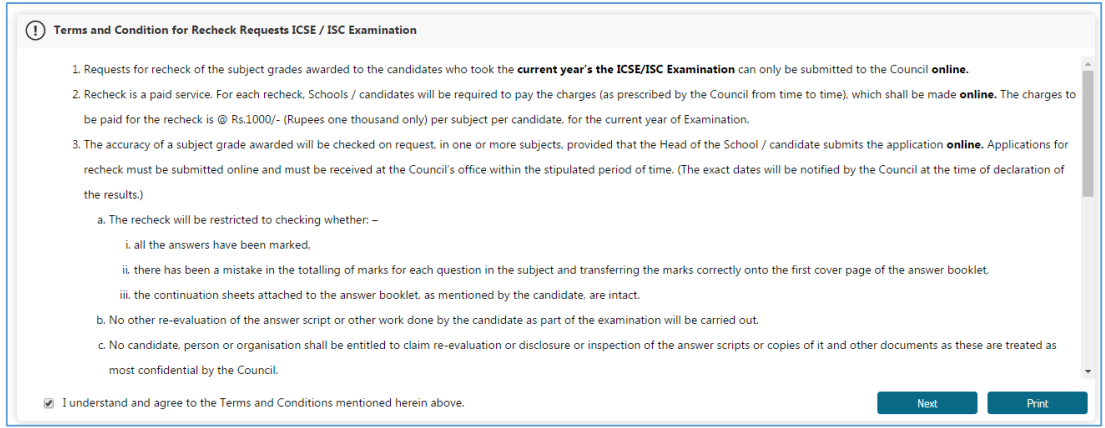
On Add New Request, the Recheck instruction screen would display up and then followed by the Recheck
request addition screen
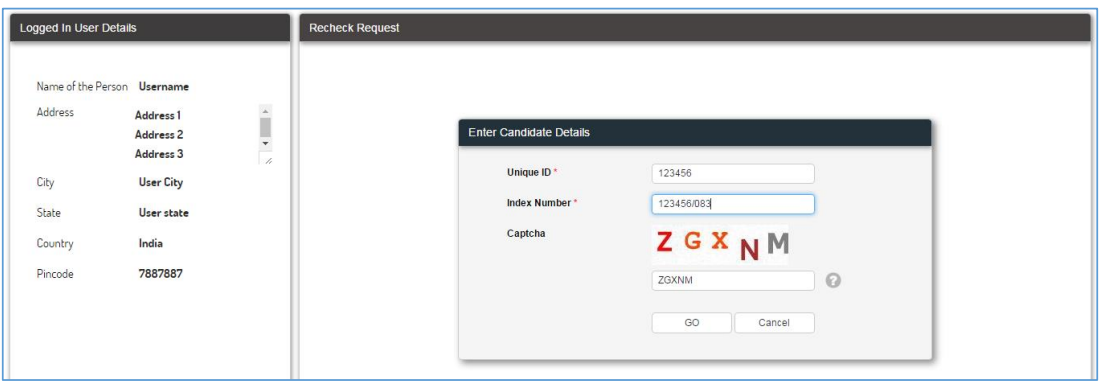
The user need to provide the Unique Id, Index Number and CAPTCHA to continue to add the recheck request. The user details would be displayed in the left pane as Logged in User details.
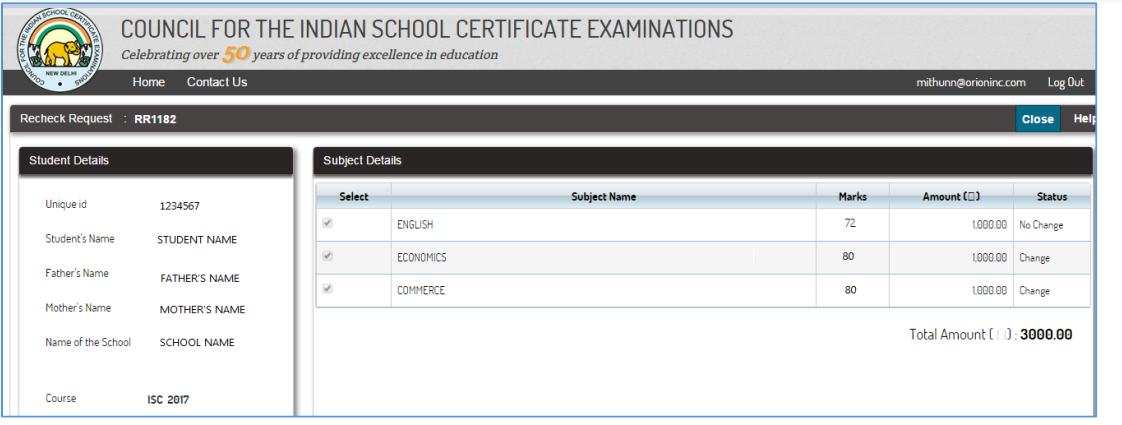
On successful validation of the Unique ID and the Index number, the user gets navigated to the subject detail screen of the candidate. The Student details would be displayed in the left pane of the page and the subject details would be displayed in the right pane for the selection of the subject for recheck. The user would select the subjects for recheck by selection the checkbox against each subject. The amount for each subject is listed against each subject. The Total amount for the selected subjects would get summed up and would be displayed in the bottom part for reference.
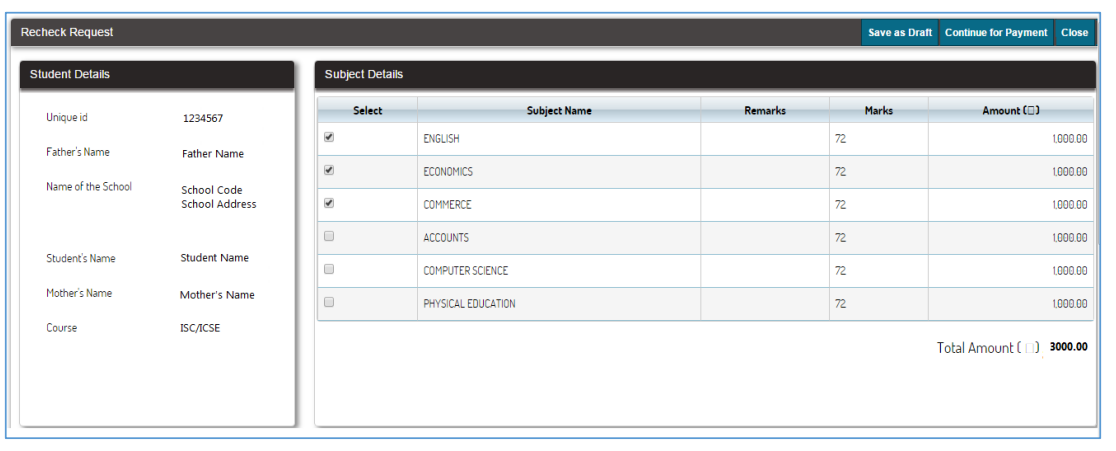
Post selection of the Subjects, the user is provided with three button options which are
Save as draft: The user can save the request as draft
Continue for Payment: The user can continue the process by proceeding to the payment option.
Close: The user can close the current window and go back to the Recheck Request home screen
Save as draft option allows the user to the save the request as draft and the request would be listed in the draft tile in the recheck home page as well as the request cab be viewed in the bottom pane with options for Edit and remove. The Edit option would take the user to the edit page where the user can edit the request by changing the subjects. The Remove option would remove the request from the list.

In the edit pane, the user would get the ReferenceId for the created request, Unique ID of the candidate, Candidate Name, Date of request, Year of Examination and subjects opted for the recheck
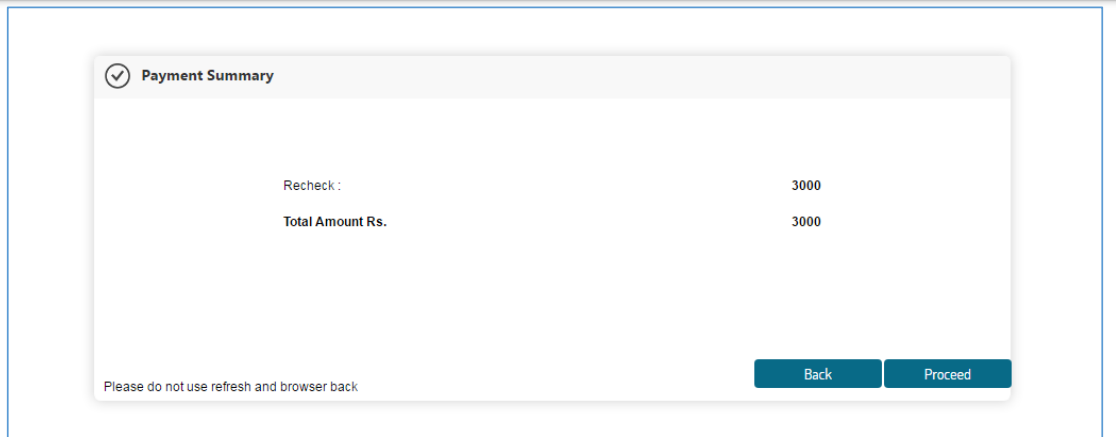
On Payment, the user would get navigated to the payment gateway page for making the payment with a confirmation message on the amount to be paid and a payment summary would be displayed. The user can complete the payment by clicking on the proceed button.
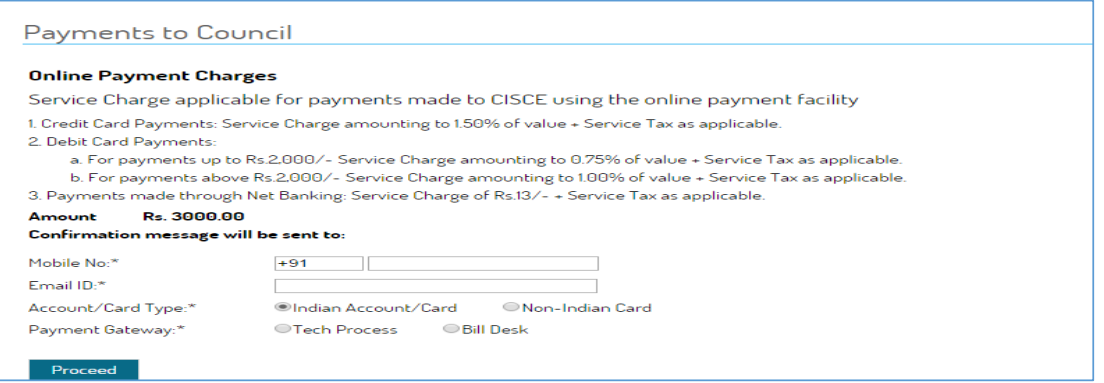
Followed by the screen, the user would be briefed with the payment instruction page where the user need to provide the email address and the mobile number for receiving the confirmation receipt.
On Successful completion of the payment, the user would get the payment receipt for the transaction and the provision to print the same.
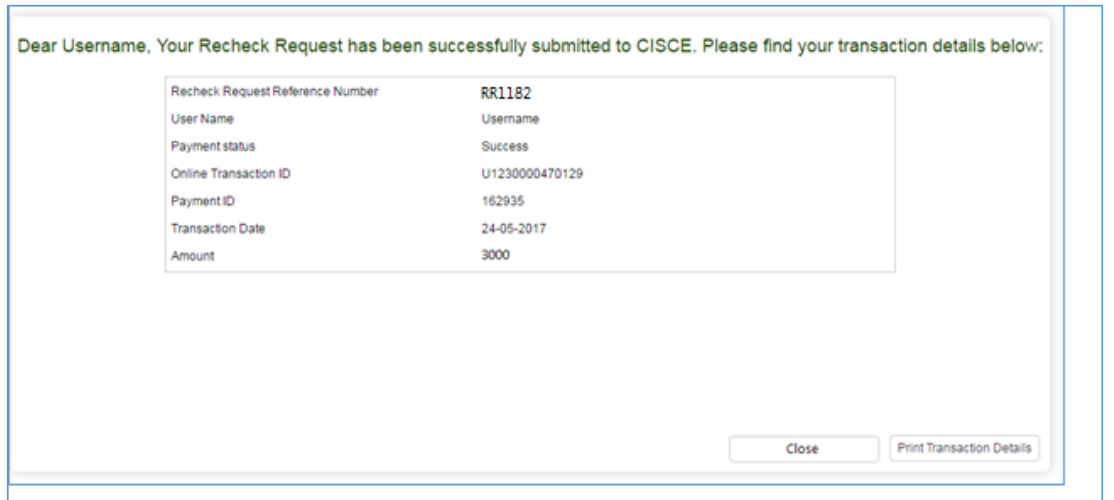
On close, the user gets navigated back to the recheck home page and the requests would be in the Submitted tile.

On completion of the recheck process, the users would get notified regarding the status and the users can follow the guidance based on the guidance provided in the notification. The completed requests would get listed in the completed requests tile.

The user can view the status of the request using the view button in the screen and close button assists the user to get back to the Recheck Home Screen.
The user gets the status of the recheck requests in the recheck status screen which can be accessed by clicking on the View button against the requests.
